Show LUTs
A Show LUT is a LUT file that is used for a specific project to get a base look down immediately. You could go so far as to having a LUT for different locations or types of locations. The difficulty in making this LUT is finding something that will work for a wide variety of scenes and lighting conditions.
LUT Types
Technical - Transforms the image from one colorspace to another. These are purely technical and will allow you to view a LOG image on a REC709 display.
Creative - This imparts a look onto the image and does not transform the image from one colorspace to another. This could be something as simple as a contrast adjustment, or it could shift certain colors more warm or cool.
Combination - A combination of the two. This will both put a creative look on the image as well as transform it from one colorspace to another.
Using a Custom LUT vs. Using REC.709
The default LUT is purely a technical LUT. It just converts it from LOG to REC709. The reason why you would opt for a creative LUT is for a few different reasons:
- Different contrast curves
- Different color curves (adjusting just the green in the shadows or doing a split-tone image)
- Overall Saturation adjustments
- Hue Vs. Sat Adjustments (Selectively saturating a skin tone, or desaturating foliage)
- Hue Vs. Lum Adjustments (Selectively darkening foliage, darkening sky)
If you are happy with the image you get from REC709 and not much has to be done to the image from there, its best to just use that. Otherwise using a LUT customized for you or for the show could be helpful to get you to a better starting place immediately.
99% of the LUTs we use are to go from one colorspace to another. So we must be sure that when we're using a LUT that it was designed for the footage we're using it on.
Creating a LUT
Starting from Scratch
- Must make sure the color management used when creating the LUT is the same as the color management used when grading. Otherwise you will have very different results from what you viewed on set.
- Any clips you make your LUT with should have the same color space as what you are shooting with. That LUT cannot then be applied to something shot with a camera that shoots in a different color space.
- In resolve you can't do color management on a project level, have to do it on the timeline or clip level so that its incorporated into the LUT.
- Keep Middle Gray color neutral.
This will keep skin tones neutral
- Don't change exposure.
- Don't do precise small adjustments. Has to work for everything.
- Hue Vs. Lum can often times create noise as it will grab very high or low values of that color and try and pull it very hard in the other direction. Sat Vs. Lum is a bit better.
Basic Node Structure is to use colorspace transform to go to DaVinci Wide Gamut at the beginning, then at the end use a color space transform to go out to Rec 709.
Can click option on the curves to anchor mid gray while adjusting other values.
Usually if you are increasing contrast you're gonna want to tame the saturation somehow.
Using a LUT as a starting point
It's okay to just put the LUT in at the beginning of your node chain and start with that and build off of it. You may also use tools like Video Villages Lattice to analyze the LUT and try and recreate it on your own. If you can get close using your own tools it can be good education for yourself. Ultimately as long as you can make your LUT pass the stress tests, then it will be fine.
Adapting Legacy LUT to your working Colorspace
Analyzing a LUT
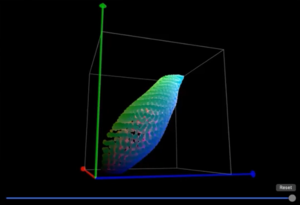
Have to figure out how to look at the cube.
Look at cube and make sure that its smooth and there are no jagged edges or weird offshoots.
Use a synthetic chart to make sure your LUT isn't clipping anything or creating any artifacting. The synthetic chart displays all of the colors within that colorspace that are possible.
